How to: Sharpening on a KME sharpening system
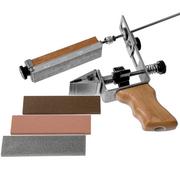
Sharpening on a sharpening system is easy once you know how it works, but sometimes a little explanation is needed. In this how-to guide, we explain how the KME sharpening system works and how you can get your knives back to their razor-sharp best!
Step 1: which knife?
As a first step, it's important to make sure that your knife is suitable for the KME sharpening system. A big advantage of the KME knife sharpeners is that the clamp can open wide. A thick bushcraft knife is therefore no problem at all. A very long blade can cause problems, though. Due to the length of the guide rod, it's possible that the sharpening stone won't be able to sharpen the entire edge of a long knife in one go. This is why we don't recommend sharpening knives with a blade longer than 25 cm with a KME sharpening system.
The KME sharpening system is designed to sharpen knives with edges that don't have any serrations or crazy shapes. KME offers the accessories that make sharpening almost any edge possible. Does your knife have a convex grind? Not a problem! Then use the KME Convex Guiding Rod. Does your knife have a serrated edge? Then use the KME diamond-coated sharpening steel. Does your knife have a wavy edge like a recurve? Then use the KME JewelStik.
Step 2: clamping the knife in a KME sharpening system
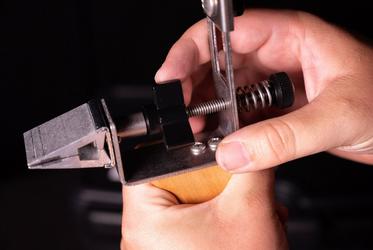
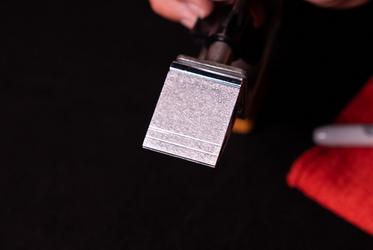
Have you got the right knife? Or the right accessories? Great! Time to clamp the knife. Hold the system by the wooden handle and loosen the black wing nut. Then push the button on the back of the sharpening system to open the clamp. As you can see, there is a thin layer of neoprene on the inside of the clamp. This ensures that your knife is kept firmly in place without getting scratches on your blade. Insert the blade straight into the clamp. This is easy thanks to the two straight reference lines on the clamp. Release the button on the back and re-tighten the wing nut. Your knife is now secure. You don't have to loosen it until you're done sharpening! This is because you can rotate the clamp 360 degrees with the knife. To do this, press the button on the back again and turn the knife upwards by the handle. You can re-clamp the clamp every 180°. This allows you to easily sharpen both sides of the edge.
Step 3: determining the sharpening angle
Now that your knife is properly secured, it's time to determine the sharpening angle. You have two choices. Either find the existing sharpening angle of your knife, or choose a sharpening angle on the sharpening system and give your knife this sharpening angle. For outdoor or pocket knives, we recommend a sharpening angle of 20° to 25°. On a kitchen knife, we recommend a sharpening angle of 15° to 20° (per side). Not sure which sharpening angle you should choose? Don't worry. It is more important to sharpen at a fixed, constant sharpening angle than to sharpen at an angle of exactly 22°, for example. Read more about the sense — and nonsense — of sharpening angles here.
Using the existing sharpening angle
Are you satisfied with your knife's current sharpening angle, and you simply want to get it back to its razor-sharp best? Use the included felt-tip pen to colour the edge in (only the part you will sharpen, not the entire blade). Put the sharpening stone with the finest grain in the holder. We choose the fine sharpening stone for this because it will remove the ink, but won't leave deep scratches. Choose the sharpening angle that you think is right for your knife and lightly pass the sharpening stone over the edge once. You can then see from the missing part of the line whether this sharpening angle is good, or whether it should be larger or smaller. Your sharpening angle is correct if there are no longer any pen marks on the edge after passing the sharpening stone over the edge.
Choosing a new sharpening angle
In many cases, you will notice during the felt-tip pen test that the sharpening stone doesn't touch the entire cutting edge, regardless of which sharpening angle you choose in the system. This is because the sharpening angle of the edge has slight variations even when it leaves the factory. It is therefore our preference to choose our own sharpening angle and set it on the sharpening system. By doing this, you give the knife one fixed sharpening angle and the sharpening stone sharpens the entire edge. Giving the knife a sharpening angle takes a little longer, but then keeping the knife sharp is much easier and less time-consuming because the sharpening angle of the KME system corresponds exactly to the sharpening angle of your knife. If you choose to give your knife a new sharpening angle, you can skip the next step, because you will always start with the coarsest sharpening stone. Preferably even with the KME The Beast 50 grit extremely coarse sharpening stone.
Step 4: choosing a sharpening stone
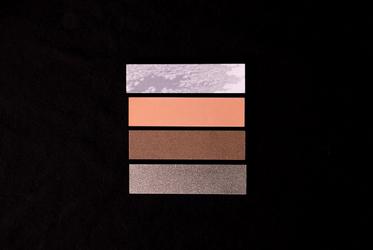
Are you sharpening with the existing sharpening angle and have you found the right sharpening angle using the felt-tip pen trick? Then it's time to choose the right sharpening stone. It isn't necessary to use a coarse sharpening stone if your knife is still reasonably sharp. The blunter the knife, the coarser the stone (or the lower the grit size) will need to be. In the following article you can read more about how to test which grit size you need.
Not sure whether you want to sharpen with ceramic stones or diamond stones? Read here to find out about the advantages and disadvantages of the different sharpening stone materials.
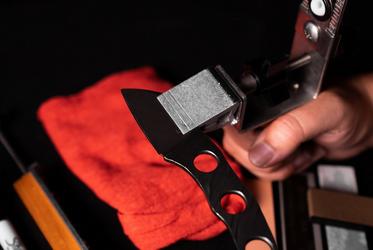
Adjust the stop on the guide bar so that the sharpening stone rests on the edge of the blade and can't fall off the edge. This could damage the edge. Once you've chosen the right sharpening stone, it's time to sharpen! You can choose the sharpening movement yourself. Up and down, diagonally or in a circular motion? The choice is yours! The sharpening system sharpens at a fixed angle. That's the most important thing!
Step 5: sharpening, and when are you finished?
A common question we get is: when is my knife sharp? A good question, and one which doesn't have an easy answer. How long you have to sharpen and the number of times you have to pass the sharpening stone over the edge depends on the bluntness of your knife, the type of steel used, the heat treatment of this steel and of course the grit size of the sharpening stone that you are sharpening with. What we can tell you is that you sharpen one side of the edge until you feel a burr on the other side of the edge. As soon as you feel a burr, it's time to turn the blade around and sharpen the other side of the edge. Try to sharpen both sides of the edge for approximately the same length of time. Which stone do you end with? It isn't always necessary to sharpen with the finest sharpening stone. Do you often use the knife to cut rope or cardboard? Then it is better not to sharpen the knife until razor-sharp. An ultra-sharp knife quickly becomes dull again with these heavy-duty tasks. In those cases, it's fine to finish sharpening with a sharpening stone between 600 and 1000 grit. Do you use the knife for light jobs like cutting meat or vegetables? Then you can safely sharpen the knife with a KME 1000 grit sharpening stone, for example. Are you really striving for a razor-sharp mirror finish? Then use the KME Lapping Films Set (also available separately) after you've used the finest sharpening stones!
Tip: the KME sharpening stone holder is an excellent addition, especially for longer sharpening sessions. It means you don't have to constantly hold the sharpening system while you are sharpening.
Conclusion:
So. You are now fully aware of how to sharpen a knife with a sharpening system from KME Sharpeners! Take a look at the different KME sharpening systems below. For all accessories and other products visit the KME Sharpeners brand page!